FTC Disclosure: Delicious Obsessions may receive comissions from purchases made through links in this article. As an Amazon Associate I earn from qualifying purchases.Read our full terms and conditions here.
Home cheese making can be a fun, yet sometimes frustrating experience. If you’re new to cheese making, I recommend starting with farmer’s cheese. It’s a very simple recipe that yields a delicious and versatile product.
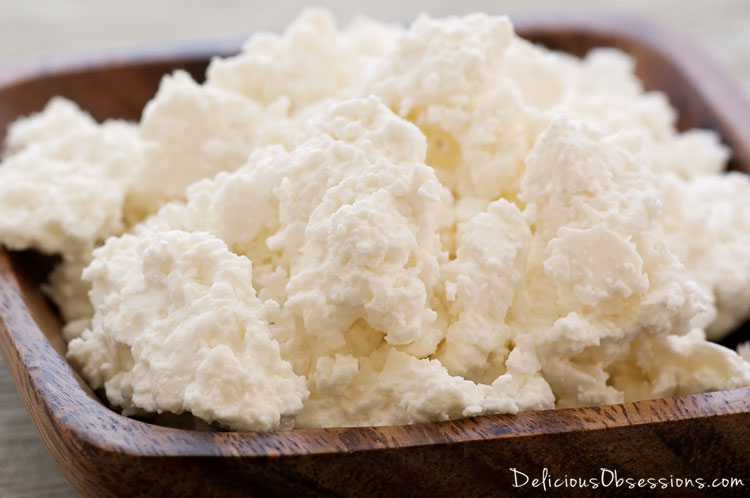
This recipe will give you a sense of accomplishment and once you’ve mastered it and then you can move on to more complicated cheese recipes. This cheese is rich, creamy, and crumbly. I love adding it to my roasted beet salad or topping a bowl of grass-fed beef chili with it. The flavor is very mild, and slightly salty, depending on how much sea salt you use.
Basic Farmer’s Cheese Recipe
makes 1 – 1 1/2 cups
Ingredients:
- 2 quarts of whole milk (raw is best, followed by Vat pasteurized milk, followed by pasteurized. Never use ultra-pasteurized)
- 2 1/4 cups cultured buttermilk
- 1 1/2 tablespoons white vinegar
- 1/4 teaspoon sea salt
Tools:
- large stainless steel pot, very, very clean for the milk
- 2-4 pieces of new cheesecloth, rinsed
- 1 large slotted spoon
- timer
- strainer
- large bowl or another pot
- twist tie or piece of clean string
Instructions:
In a large pot over low heat, heat the milk until it just starts to simmer. This is a slow, slow process – depending on the temperature of your milk when you put it in the pot, it can take anywhere from 30 minutes to an hour or more. You want to heat it over the lowest heat possible, but depending on your stove, you may have to crank it up to medium-low (you always want it to be on the lowest heat possible in order to avoid killing the beneficial bacteria in the milk). Stir the milk constantly to prevent it from sticking and burning to the bottom of the pan.
As soon as the milk starts to simmer, turn off the heat and add the buttermilk and the white vinegar. Stir the mixture slowly and you’ll see the curds form almost immediately. The remaining liquid is the whey. Remove the pot from the heat and let it sit for 5-10 minutes.
While this is sitting, prepare your strainer with your wet cheesecloth (2-4 layers, depending on the thickness of your cheesecloth). Make sure you place your strainer over a large bowl or another pot so it can catch the whey. Gently ladle the curds into the strainer and let it drain for about 10 minutes. Don’t throw away the whey (see note* at bottom of post)!!
Once the initial draining is done, you can decide what consistency you want your cheese to be.
For moist, spreadable cheese, remove from the cheesecloth, place cheese in a bowl and stir in the salt. The cheese is now ready to eat. It should be the consistency of cream cheese or ricotta cheese. If it’s too dry, add back in a little whey. It’s delicious spread on crackers, toast or sandwiches.
For drier, crumblier cheese, twist the cheesecloth up tightly, tie with a piece of string and let it hang over the pot for 20-30 minutes. If it’s still too moist, you can twist it even tighter and squeeze out the rest of the whey. Untie the cheesecloth and remove the chunk of cheese and place in a bowl. Break up the cheese into smaller pieces and sprinkle the salt over it. Continue to break up the larger pieces until you have the size of cheese you want. If it is too dry for your liking, sprinkle some of the leftover whey over it until you reach your desired consistency. I like little bite size crumbles to sprinkle on salads.
This cheese will keep in the refrigerator for 5-7 days. It also freezes really well and melts beautifully, so it works great in lasagna and other casseroles.
*NOTE – Don’t throw out the whey leftover from the cheese making. Many people think it’s a useless by-product, but whey is actually a little powerhouse of nutrition all on it’s own. It is a complete protein and is packed with amino acids. There are many ways to use whey, including using it in smoothies, soups, to replace liquids in baked goods, and to soak your grains or legumes. You can also drink it plain and use it to sooth irritated skin and help that “glow” return. I also pour it over my dog’s food for an extra boost of protein and amino acids in their diet. Boy do they love it when I do that! 🙂
Nourishing Traditions uses whey in many of the recipes and also has lengthy information on the nutritional benefit of this liquid.
Happy cheese making!!


7 Comments