FTC Disclosure: Delicious Obsessions may receive comissions from purchases made through links in this article. As an Amazon Associate I earn from qualifying purchases.Read our full terms and conditions here.
One of the questions that I get asked a lot is how to use henna for hair.
I have a total fascination with henna. I absolutely love it.
I used to color treat my hair with those nasty commercial dyes. I am naturally a dark blond, but I have always preferred to be a redhead. Maybe because my mother is a redhead, as is my sister and one of my brothers. Maybe it’s a subconscious desire to fit in! 😉
It wasn’t until Thanksgiving 2010 that I gave henna a try. I had sworn off dyes about a year prior to that because I knew they weren’t good for me. Then, when my sister and I were hanging out over Thanksgiving, she decided she wanted to henna my hair.
So, she did. And I fell in love!
Since I’ve started using henna, my hair is much healthier, smoother, less breakage, etc. I know that diet plays a large role in the health of your hair as well, something that I have learned all too well since I started my journey to health in August 2012. Read my 5 Tips for Perfectly Healthy Hair here.
What is Henna?
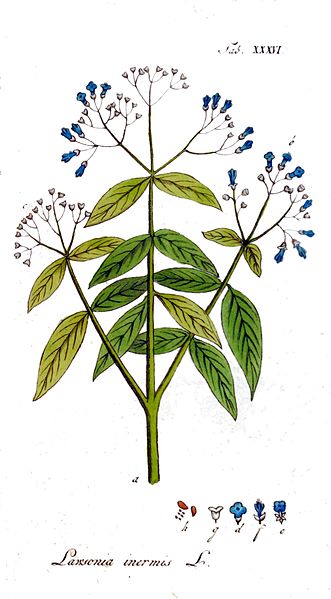
Image Courtesy of Wikipedia Commons
Henna is a flowering plant that has been used for centuries as a dye, whether it be for the hair, skin, fingernails, fabric, silk, wool, or leather.
Henna refers specifically to the plant that provides the red color. The term itself is often used interchangeably for other skin and hair dyes such as black henna (Indigo) or neutral henna (Senna or Cassia), neither of which come from the henna plant.
The henna plant is a small tree that is native to the tropical and subtropical regions of Africa, Southern Asia, and northern Australasia.
For commercial use, it is typically cultivated in Morocco, Algeria, Yemen, Tunisia, Libya, Saudi Arabia, Egypt, India, Iraq, Iran, Pakistan, Bangladesh, Afghanistan, Turkey, Somalia and Sudan. The largest cultivated area of India is the Pali district of Rajasthan. There are over 100 henna processors operating in Sojat City alone. Source.
Henna has been used since the Bronze age and is traditionally used in some regions for festivals and celebrations.
There is mention of henna as a hair dye in Indian court records around 400 CE, in Rome during the Roman Empire, and in Spain during Convivencia. It was listed in the medical texts of the Ebers Papyrus (16th c BCE Egypt) and by Ibn Qayyim al-Jawziyya (14th c CE (Syria and Egypt) as a medicinal herb. In Morocco, wool is dyed and ornamented with henna, as are drumheads and other leather goods. Source.
Recently, there has been a resurgence in henna use due to improved cultivation and processing methods, as well as people becoming more concerned about chemical exposure and looking for ways to reduce that.
For dying the skin, a paste is made with dried henna and then used to paint intricate designs on the skin. Depending on the quality of the henna and each person’s skin types, henna art can last up to a month.
Henna also has anti-fungal properties and is sometimes used as a preservative for leather and cloth.
Henna flowers were long used to create perfumes and this tradition is starting to become more popular as well. Henna also has been known to repel mildew and insects. Source.
The coloring properties of henna come from lawsone, which is a burgundy organic compound that likes to bond to protein (hair, skin, etc.).
Lawsone is most concentrated in the leaves of the plant. What’s fascinating is that henna will not stain the skin or hair until those lawsone molecules are released from the henna leaf. In order for this to happen, they must be “activated” with a mildly acidic liquid.
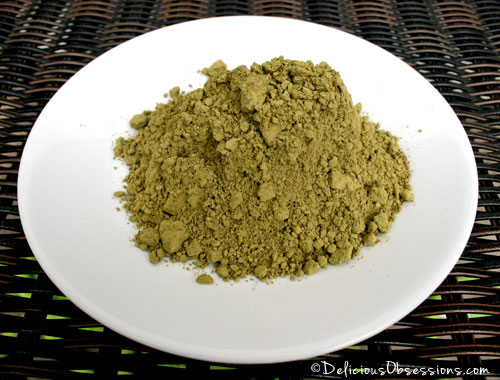
You will most commonly see the henna in powder form, which is create from grinding the dried leaves. There are a lot of different techniques that people use when mixing their henna to improve its staining ability, including mixing with lemon juice, apple cider vinegar, strong tea, etc. Once the henna is mixed with the liquid, it needs to sit for 12-24 hours to become fully “activated”. Source.
In some rare occasions, henna can have negative health effects. It is known to be dangerous for those who suffer from glucose-6-phosphate dehydrogenase deficiency (G6PD deficiency).
Typically if you are using a high-quality henna that you mix yourself, it is rare to have any side effects. Some people may experience an allergic reaction to the henna touching their skin, so it is advised to do a skin test first. That said, in all of the people I know who use henna, I have never heard of anyone having a reaction.
Pre-mixed henna paste can be dangerous, so it is advised to avoid those. Many of these pre-mixed products include some toxic and unsavory ingredients. I’ve honestly never seen pre-mixed henna locally, but I know you can buy them online. I’d recommend steering clear of them, just for the fact that they are not going to be as high quality, but also for the fact that they do contain some unsavory, and sometimes toxic chemical and preservatives. If you do use a pre-mixed version, make sure you thoroughly investigate the ingredients. Source.
I have been using the high-quality henna from my affiliate partner, Morrocco Method International. I really like their products and have finally found a hair care routine that works for me. Read about my hair care routine, tips for healthy hair, and my own struggles with hair loss here.

How I Use Henna
First and foremost, the key with henna is to avoid those cheap boxed hennas at the grocery store and get body art quality henna. The best 10% of henna is reserved for this use.
Body quality art henna is going to be much higher quality than the stuff you can buy in the store (which is the other 90% of henna). The color will be so much better and the color will stay true until you either touch up your roots or let it grow out. It never fades, plus you will know it is pure henna and not adulterated with other, potentially toxic, ingredients.
These are the things you should look at to ensure you are getting the highest quality henna:
- Has very high natural dye content
- Is carefully cleaned, ground, and sifted for utmost quality
- Is pure and only comes from dried, powdered lawsonia inermis leaves
You want to only use henna that has been been tested and certified as pure by independent labs. Henna can easily be adulterated with additional (harmful) chemicals, even if they are not listed on the label. This includes the henna that you will find in some salons, as well as the pre-packaged and pre-mixed types that I mentioned above.
There’s a lot of info about henna around the Web, but here are a few “don’ts” from Catherine of Mehandi.com on how to get the best results when you color. Catherine is a henna guru — she even wrote her dissertation on henna, so I trust her research.
Some brands will state the following items as being OK, but I personally choose to stick with the instructions that Catherine laid out:
- Don’t mix your henna with coffee. This won’t change the color and will also smell horrible, potentially leading to a massive headache. Clove powder may sometimes intensify the color, but can irritate the skin, so use caution.
- Don’t forget to use an acidic activator like lemon juice or vinegar.
- Don’t use yogurt as your acidic liquid. The protein will interfere with the releasing of the dye and also affect the hair’s uptake capability. Same with eggs. The protein will interfere with the dye, so don’t add eggs to your henna.
- Don’t use boiling water. The boiling water will alter the color and will result in a faded, brassy color.
- Don’t be stingy with the henna paste. Use lots. Thick application means better coverage and color.
- Don’t forget to cover your clothes, sink, etc., with old towels or old clothes. This is messy and it will stain permanently.
I typically henna my hair every two months. My roots are pretty noticeable by the time I get around to doing it, but it is a bit pricey, so I like to extend it out as much as I can. I wish I could do a batch of henna in my hair each week, because it is the most amazing conditioner. It leaves my hair feeling wonderful – full, soft, and lots of body. If you want, you can do smaller batches to touch up just the roots, but I personally just do my whole head at once.
I purchase my body art quality henna from my affiliate partner, Morrocco Method. I personally love their light brown henna, which is a blend of henna and indigo. It gives me a really rich auburn without the brassy look that fresh henna sometimes leaves on your hair. I also use their regular red henna, which has no indigo added. I like both — it just depends on the mood I’m in! 🙂
Since I love henna so much, I am very cautious about where I buy it. I love the henna from Morrocco Method (as well as other products of theirs) and I discuss that in this video:
My Henna Process
Here is my process. If you decide to give henna a try, you will quickly learn what works for your own personal needs. I recommend checking out this FAQs page before you start your first batch of henna, just to make sure you know everything you need to know!
1. The day before I want to henna, I mix up 1/2 packet of the henna with a scant tablespoon of lemon juice and about 1/2 – 3/4 cup of water.
You want the henna to be mashed potatoes consistency or a tad thinner. Start off with 1/4 cup of water and add a little at a time until you get the right consistency.
I cover the bowl tightly with plastic wrap and leave it out for 16-24 hours.
This is what the dry henna looks like. I should have taken a picture of the paste once it’s mixed. I’ll do that next time and add it in.
2. On the day that I am going to henna, I don’t wash my hair, though it doesn’t really matter.
3. I brush my hair to get any tangles out and then proceed to the messy stuff.
4. I place a towel (that I don’t mind staining) over my sink, to protect the counter in case I spill any. I also either wear an old shirt that I don’t care about, or I wrap an old towel around my shoulders to protect my clothes. ALWAYS wear gloves, your else your hands will not match your body when you’re done.
5. I unwrap the henna mixture and then start massaging it into my hair. Most experts will say to portion off your hair and do it in little chunks (like the do at salons when doing color). But, my hair is relatively short, and honestly, I am not that patient to portion my hair into sections.
So, I just start at the top and work my way down. I use a little bit at a time and massage all the way down to the roots. Make sure you really work it in there. If you have longer hair, you will need to portion it off for sure. Don’t be afraid of using too much — you want it to be thick on your hair, like your generously frosting a cake.
6. I work the henna into my hair, making sure it is all that way down to the scalp and every inch of my hair is covered, including the fine little hairs around your ears and the base of your neck. If you get any globs of henna on your skin, just wipe off with a damp towel. They may stain your skin a light orange, but it fades very quickly due to the natural oils on your skin.
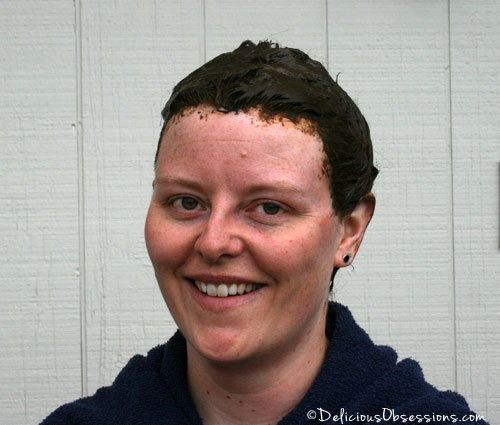
7. Once I have used all of the henna mixture, I wrap my hair in plastic wrap. You could also use a shower cap, but I find that the plastic wrap works better, stays snugly around your head, and keeps the humidity in. Here I am right before putting on the plastic wrap, all gooped up!
8. I leave the henna in my hair for a minimum of 4 hours. Depending on my schedule, I may leave it in overnight if I end up doing it late in the evening.
I would recommend at least 2-3 hours minimum for the full color to develop. Henna is a great conditioner, so leaving it on for longer won’t hurt at all.
9. When it’s time to wash it out, I hop in the shower and carefully remove the plastic wrap. Fold it up so that the henna is all contained on it, that way it doesn’t accidentally stain anything in the shower. Rinse with warm water until the water runs mostly clear and all of the paste is out. This may take a little while. You can also shampoo your hair if you need to as well. Make sure you scrub your scalp, as there will be some residue lingering on your skin.
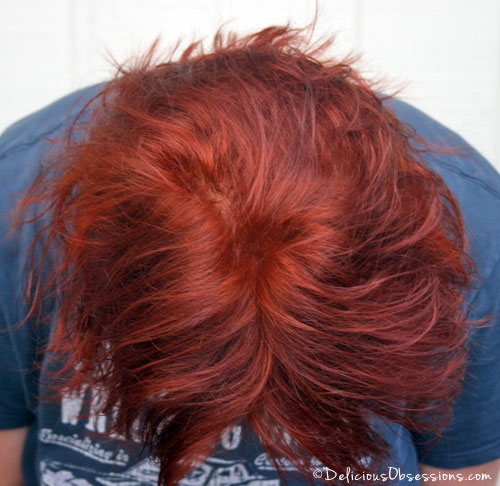
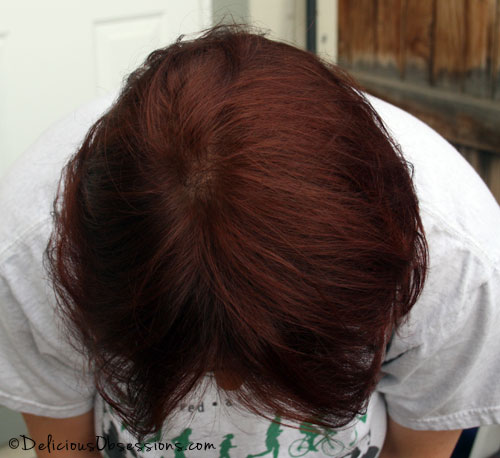
10. Keep in mind that your henna may look brighter and a little brassy at first. Give it 2-3 days and it tones down. Here are photos, the first one is right after I washed the henna out and dried my hair. The second one was taken a week or so later. You can see how much to color tones down.
I really love henna and its versatility, plus the fact that it’s a non-toxic way for me to continue dying my hair. Have you used henna? I’d love to hear from you!


45 Comments