FTC Disclosure: Delicious Obsessions may receive comissions from purchases made through links in this article. As an Amazon Associate I earn from qualifying purchases.Read our full terms and conditions here.
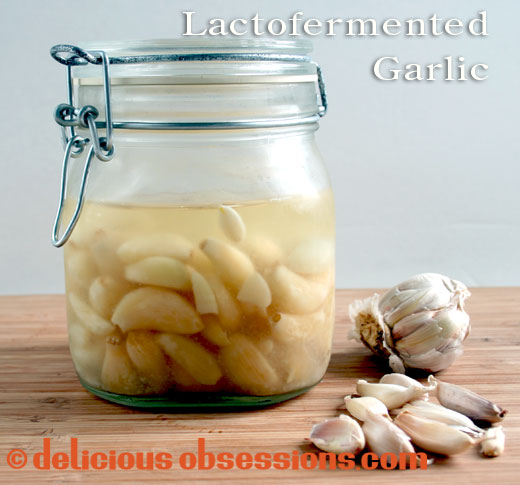
When I started out on this lactofermentation journey this year, the very first ferment that I made was fermented garlic. It was so easy to do and the results were amazingly delicious. The cloves lost their heat and almost became buttery in texture. The flavors were strongly garlic, but they were more complex than just your normal clove of raw garlic. I was hooked and have kept a jar on hand at all times since. You can see that I’ve already eaten half of the jar above and I really need to make more!
I was hooked and have kept a jar on hand at all times since. You can see that I’ve already eaten half of the jar above and I really need to make more! The brine can be used in salad dressings for an amazing garlic kick. The cloves can be used just like you would fresh garlic. If they are kept in raw form, you’ll retain the probiotic goodness, but they add such amazing flavor to cooked dishes that I use them all the time. I highly recommend making these, if you haven’t already. Did I tell you I use them all the time? I’ve lost count of how much garlic I’ve eaten since the beginning of the year, but I think on average, I consume about a quart of
The brine can be used in salad dressings for an amazing garlic kick. The cloves can be used just like you would fresh garlic. If they are kept in raw form, you’ll retain the probiotic goodness, but they add such amazing flavor to cooked dishes that I use them all the time. I highly recommend making these, if you haven’t already. Did I tell you I use them all the time? I’ve lost count of how much garlic I’ve eaten since the beginning of the year, but I think on average, I consume about a quart of
I highly recommend making these, if you haven’t already. Did I tell you I use them all the time? I’ve lost count of how much garlic I’ve eaten since the beginning of the year, but I think on average, I consume about a quart of lactofermented garlic per month. Yowzah! Surprised my husband still kisses me! 😉
Since my original recipe was made using the old Mason jar method, I figured it was time to update the recipe for the anaerobic jars that I have now switched to. I recommend the jar systems from The Probiotic Jar. For those of you who are now fermenting in these vessels, here’s how to do it.
First, a few tips:
- Only use organic garlic for this — commercial garlic has most likely been sprayed to reduce or eliminate the risk of the heads sprouting.
- Take your time with the skins, as not to damage the flesh of the garlic clove.
- Do not cut off the root end.
- Make sure you allow plenty of time for peeling. This can sometimes take awhile, but trust me, the work is worth it!
How to Make Lactofermented Garlic
1. Determine how much garlic you want. Because the number of cloves in a head of garlic varies so much, it’s hard to tell you exactly how many heads you’ll need. I usually start with about 12-16 heads and see how far that gets me (usually about a 1-liter anaerobic fermenting jar).
2. Remove and separate all of the cloves from the root end of the head. Leave the skins on.
3. Prepare your brine – 2% (19 grams of salt per 4 cups of water).
4. To remove the skins, use this cool trick – How to Peel a Head of Garlic in 10 Seconds.
5. Once all of the skins have been removed, place the cloves in your anaerobic fermenting jar. Don’t pack past the shoulder of the jar.
6. Add your weight. Top with your 2% brine, up to the shoulder of the jar.
7. Add your airlock and close the lid. Wrap the jar with a towel to keep the light out (remember, UV light destroys the goodness we’re trying to cultivate).
8. Leave at room temperature for one month. Make sure you check your airlock every so often to ensure it doesn’t dry up.
9. Move to cold storage to continue aging for two more months. If you can hold off, try to wait the full fermentation period before eating. The flavor will be out of this world. But, I do know that it’s hard to wait that long, so if you must, you can start using right away. But, you will thank me if you do let it go for a couple more months before eating. It will keep upwards of a year+ in the fridge. I highly doubt it will last that long though!
Note: If your garlic turns blue or green, don’t be alarmed! The color change happens when the anthocyanins and/or the sulfur compounds react with the acidity or minerals in the water. Many times, it’s the reaction of the garlic to copper in the water. It is still totally edible and won’t hurt you.


108 Comments