FTC Disclosure: Delicious Obsessions may receive comissions from purchases made through links in this article. As an Amazon Associate I earn from qualifying purchases.Read our full terms and conditions here.

Butter.
Does it get any better than butter?
I think not. And I’m pretty sure other people agree with me, based on the comments I received on a recent Facebook post where I stated that “sourdough bread is simply a vessel to carry big globs of grass-fed butter to my mouth.”
So, now that we have all agreed that butter (and by butter, I mean grass-fed butter) is awesome, I have to ask. Have you ever made your own butter? If not, why? It’s so easy and there really is no reason not to make it at least once in your life. There is something so satisfying and soothing about making butter. Maybe it’s because it takes us back to a simpler time when life wasn’t so hectic, before computers, and Facebook, and blogs (oh my!). Or, maybe it’s just the satisfaction of making something on your own that you would normally buy at the store.
I don’t make homemade butter often, mainly because I don’t have access to good quality cream that does not cost an arm and a leg. I typically buy KerryGold, which is grass-fed and excellent in taste. When compared with regular butter, even organic butter, grass-fed is so far superior, it’s hard to describe!
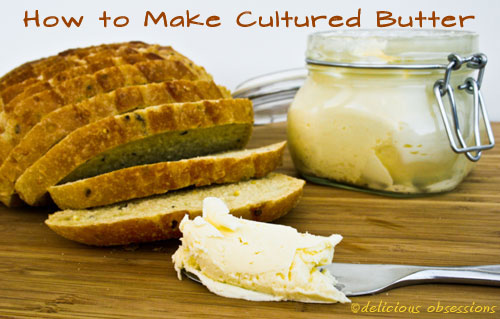
Cultured vs. Sweet Cream Butter
Now, cultured butter is a whole different animal when compared to sweet cream butter. I love both equally. Sweet cream is delicate, rich, and sweet. Cultured butter, on the other hand, is tart and tangy, giving that piece of bread a little extra zip in the mornings. Cultured butter is much more popular in Europe than it is here in the States. The only brand that I know of that makes
Sweet cream is delicate, rich, and sweet. It is what your taste buds are most familiar with when you think of butter.
Cultured butter, on the other hand, is tart and tangy, giving that piece of bread a little extra zip in the mornings. Cultured butter is much more popular in Europe than it is here in the States. The only brand that I know of that makes cultured European-style butter is Organic Valley. Some specialty shops and local health food stores will sometimes sell cultured butter, but it’s definitely harder to find, so that’s why we usually have to resort to making our own.
Don’t get intimidated! Making your own at home is so easy. It only takes two ingredients and a little bit of time. So, let’s get started, shall we?
How to Make European Style Cultured Butter
makes approx. 1 pound
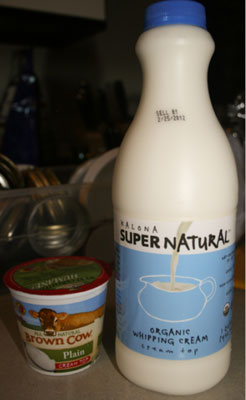
1 quart of high-quality organic cream (raw is best if you’re lucky enough to have access, but anything except ultra-pasteurized is fine)
1 6oz cup of plain, whole milk yogurt with live cultures
Since I don’t have access to fresh, raw cream, I use cream from Kalona Organics. It’s grass-fed and VAT-pasteurized, and it’s the highest quality I can find here in Denver. If you have raw cream … sigh … well, you’re just plain lucky and I want to come over for dinner 😉
In a very, very clean glass bowl or jar, mix the cream and yogurt together gently (I always sanitize my bowl in boiling water whenever I’m starting a new ferment or culture). You want to make sure you’re gentle when you’re whisking the yogurt and cream together because you don’t want the cream to start whipping. Cover tightly with plastic wrap or a sterile lid and let sit out a room temperature overnight or up to 2 days, depending on your house’s temperature. The warmer it is, the faster it will culture. Mine took around 24 hours. If you want a more tart butter, you can leave it longer.
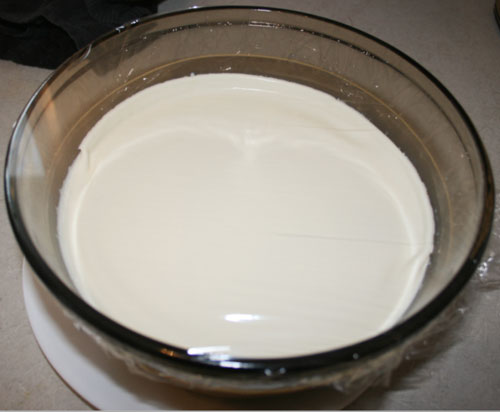
You will know when the cream is ready to make butter when you shake the bowl or jar and it appears thick and doesn’t slosh around. This means the bacteria have been active in working their magic. It should be like a thick kefir consistency. It’s hard to see in the photo below, but when I tilted the bowl to the side, the cream stayed around the edges because it was so thick.
Once your cream is ready to go, you’ll need to gather a couple tools:
- A stand mixer (and its bowl) or a hand mixer with a large, clean bowl
- The whisk attachment for your mixer
- A spatula
- A clean jar or glass for your buttermilk
- Some plastic wrap or a cover for your mixer
- A strainer (optional)
- Some cheesecloth (optional)
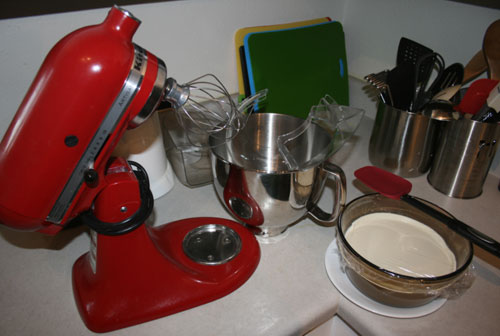
Once you’ve gathered your supplies, you’ll add the cream to your mixing bowl and start to whip it on medium-high speed until soft peaks start to form.
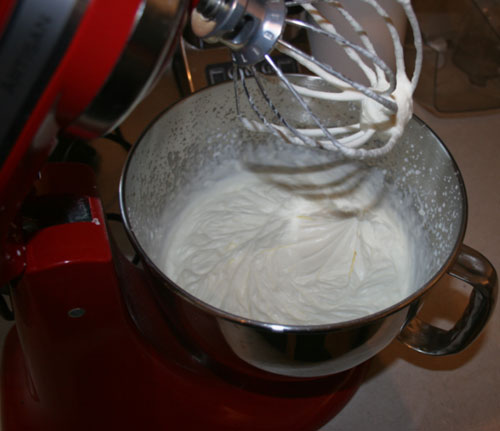
After the soft peaks form, turn down the speed to medium and add your cover. My stand mixer came with a cover that I use, but if you don’t have a cover, I have had good luck tenting some plastic wrap over the mixer and bowl. If you’re using a hand mixer, then I’m not sure how you’d do this step, but I’m sure there is a creative way. Or, just make sure you’re wearing an apron and charge on! 🙂
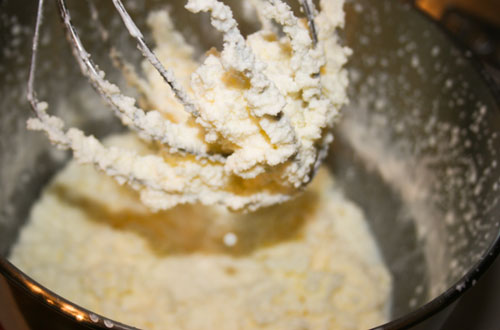
Before too long, you’ll notice that the cream will start to look a little like crumbled cheese. This happens just as it pushes past the whipped cream stage and right before it separates out into butter and buttermilk. Turn your mixer down to medium-low.
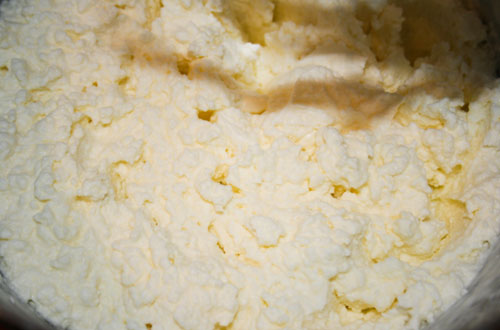
Because this next phase happens quickly, make sure you did indeed turn your mixer on medium-low, otherwise, you will end up covered in buttermilk as it sloshes out of the bowl (some will probably still slosh out, even on the lower speed). Keep the mixer on medium-low speed and the butter will completely separate from the buttermilk. This will probably happen only a few seconds after it reaches the cheese-like stage above.
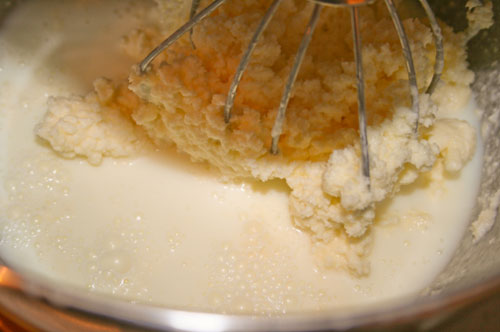
When you reach this point, turn off the mixer and pour off the buttermilk. You can use the strainer for this if you’d like, or just use your spatula to hold the butter back as your pour. You can save the buttermilk for baking, making buttermilk fried chicken (boy, that sounds good), or, if you’re like me, you can just chill it and drink it. YUM!
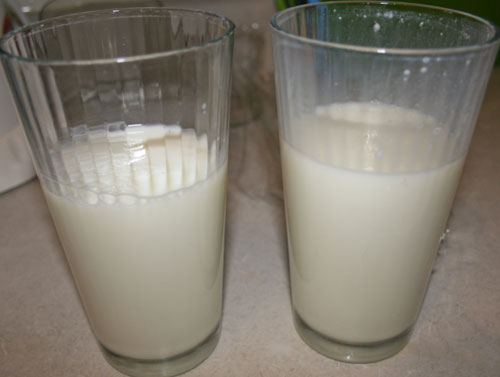
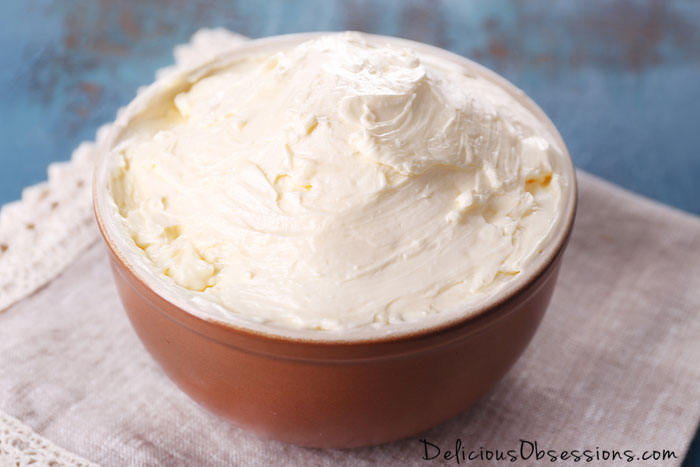
And now, you have butter! Isn’t it gorgeous? This batch is not nearly as yellow as other times that I have made it, because it’s the middle of February and most cows aren’t out on lush, green grass right now. Make this again in the spring and summer, and the color will be quite vibrant!
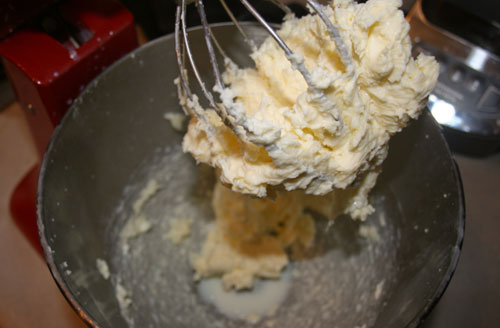
Once you pour off the buttermilk, it’s time to wash the butter. Washing the butter will ensure all of the buttermilk is out and will help extend its shelf life. Though, if you’re like me, homemade butter won’t last long enough to go bad!
To wash the butter, add some cold, filtered water to the butter in your mixing bowl (I use about 3 cups of water at a time), and mix at low speed until the water is clear. You’ll need to do this several times to get clear water. For this batch, it took 4 cycles of washing to get clear water. Just mix for a couple minutes, pour off the water, add more clean water, mix again, pour off the water, etc.
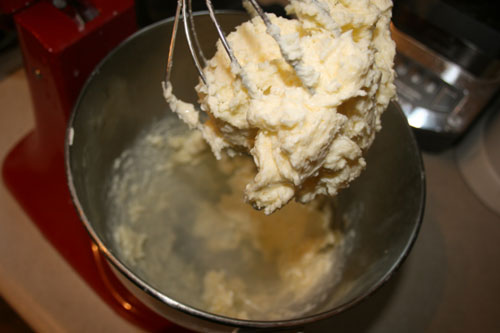
Once the butter has been washed, I like to take my spatula and mush the butter around in the bowl to release more of the water. Then, I pour off any remaining liquid and flavor my butter. You can add fresh herbs, spices, etc. For this batch, I added 1/4 tsp. of pink Himalayan sea salt.
The next step is optional — sometimes I do it and sometimes I don’t. If you really want to make sure all of the water is out of your butter, place it in a clean, fine-mesh tea towel or some cheesecloth and let it hang for a couple hours. This will pull any remaining water out of it. Most of the time, I am lazy and don’t do this step.
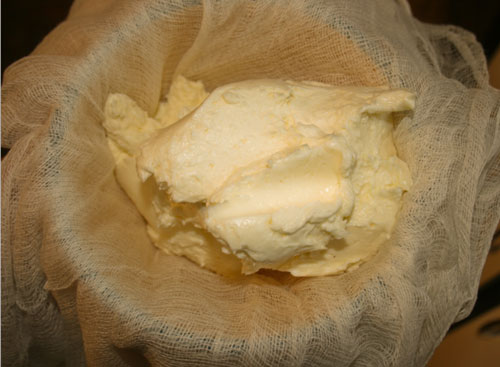
There you have it! You have made butter! Fresh, gorgeous, homemade, cultured butter! Another perfect way to get more probiotics in your system. I am pretty confident that once you make your own butter, you will be hooked. Especially, if you have access to really high-quality cream. The quality of the cream makes all the difference in the end product.
If you want sweet cream butter, just skip adding the yogurt and culturing at room temperature. You can just dump your bottle of cream in the mixer and follow all of the other steps. Super easy, super fast, and super rewarding!
Now, it’s time for breakfast. Let’s go eat some butter! Tell me, have you made butter before? Have you made cultured butter?
For further reading, check out Butter IS Better: The Health Benefits of Grass-Fed Butter and The Saturated Fat Myth: Eat More Butter (and Coconut Oil)!
Delicious Obsessions is a participant in the Amazon Services LLC Associates Program, an affiliate advertising program designed to provide a means for us to earn fees by linking to Amazon.com and affiliated sites.Read our full terms and conditions here.

Unfortunately KerryGold is not as pure as it used to be. Ireland is changing and is making raw milk illegal.
It’s sad isn’t it? We just keep losing access to quality food. More reason to become as sustainable as possible!
Since I can buy it at Costco I have been wondering how it can be as high quality as everyone says. I assume that KerryGold supplies Ireland with butter as well us. Just wondering how many small farmers with grass grazing cows could possibly be over there making great butter.
Awe! Sorry to hear Suzanne’s comment about Ireland.
I LOVE fresh butter. Thanks for the great step-by-step instructions! I learned recently how important it is to rinse it well. I have not made butter yet, but I buy raw milk from a lady who makes butter. I would prefer to make my own b/c the last batch I got from her had not been rinsed well and tasted a bit sour. Also, when I put some in a pan to melt it, it wasn’t like melting regular butter. t had a lot of milky liquid that melted out. So, if you’re not going to gobble it up right away, definitely rinse your butter well and remove all the buttermilk!
Yes! I made a batch one time that I didn’t wash well and it went sour really fast. The cultured butter is going to be a bit sour and tart, just because it’s cultured, but the batch that I didn’t wash well almost smelled rotten. Washing is very important.
And yes, that is sad about Ireland. 🙁 I love KerryGold and even though they’re not organic, they are grass-fed. Sad to see us continually losing access to quality food.
My parents grew up on small farms a mile apart and my father grew up with cultured butter. If you just leave raw cream out till it sours that is the traditional way to make cultured butter. My father grew up eating it that way all the time. My mothers family always kept theirs in the fridge so it was sweet. My fathers family is much healthier than my mothers family and I do wonder if that approach to food is part of the reason why.
I bet it is! I wish I could get my hands on some raw cream and let it sour for butter! I bet it tastes 1000% times better than mine! 🙂 YUM!
Great post! I use my kefir grains to culture the cream, and I use my cuisinart to make it. I think it’s faster than with the mixer.
I always leave it out with cheesecloth over the top, should I be using a lid or plastic wrap?
Sorry you don’t have access to raw cream. I’d send you some if I could!
Hi Amy. When I get some kefir grains, I’ll have to do that! Is it a Cuisinart food processor or blender that you use? I’ve heard of people doing it in both. I don’t think it really matters how it’s covered. Cheesecloth might actually help it culture faster because it would have access to some of the good bacteria in the air. I wish you could send me some raw cream! That would be awesome!! 🙂
So great to hear your butter-making directions! It really makes me re-think getting dairy goats instead of a milk cow. Decisions, decisions…
Get both! 🙂 Hahaha! I would love to have a cow someday. A Jersey or a Brown Swiss would be awesome! Can you not make butter out of goat’s cream? I don’t know enough about goats milk to know if they have enough cream on their milk to do that. Although, if I remember correctly, goats milk tends to be more homogenized, so getting enough cream to skim off might be tough. That is a tough decision. Let me know what you decide on! I’d love to see pics of the critters! 🙂
Great tutorial and pictures!
Amanda
Thanks Amanda! 🙂
i use kefired cream as well.. YUMMY!!!
Yum indeed! I’ll have to try that next time now that I have milk kefir grains again!
Wouldn’t it be easier to just drain (cheesecloth) the butter than wash it?
You can certainly do that. Most likely you won’t be able to get as much buttermilk out. The times that I have skipped the washing step, the butter goes bad much faster than when I wash it. But, there are times that I’m feeling lazy and don’t! 🙂
Jessica, this is a GREAT post! I would LOVE to have you share it on Wildcrafting Wednesday! I’m sure my readers would love it too! 🙂
Thanks!
~ Kathy
Thank you Kathy! I’ll go over and check it out. Thank you for the invite! 🙂
Thanks for sharing this grea tutorial with the hearth and Soul Hop. I look forward to trying my hand at making cultured butter.
Great tutorial! I didn’t know cultured butter was so easy (and similar to sweet cream butter). 🙂
I’m guessing that if you use raw cream you don’t need a separate culture like yogurt but perhaps you need to let it sour? I’m also guessing that if you make sweet cream (without the culture but homogenized or refrigerated) that you don’t need the wash either? Thanks.
I’ve never made it with raw cream before, but I do believe you’re right. Souring it a bit will give it that tangy taste. I wash my butter, regardless of sweet cream or cultured. You want to get all of that buttermilk out to help preserve the “shelf life” of it. If you know you’re going to use it up quickly, then it’s not as critical, but if you think it might be a bit, I would definitely make sure to wash it. 🙂
I just found a local farmer to buy raw milk from so I’m excited to try making my own butter too! Thanks for this post!
I get raw dairy from a local farm: milk, cream, butter, etc. I was wondering how long the butter will last in the freezer?
Judy – I’ve been told that butter will last 6mos to a year in the freezer, and sometimes longer. I usually wrap mine really tight in a few layers of plastic wrap and then put in freezer ziploc bags. This helps reduce the chance of the butter absorbing that weird freezer smell that some things get.
This looks delicious and I am definitely going to make it! I’ve recently gotten into culturing. I make my own non-fat yoghurt and I’m wondering if I can use that rather than the whole fat yoghurt?
Thanks!
When I was growing up we got milk from a farmer down the road. My mom would always skim some of the cream off the top for other uses such as ice cream in the summer and butter. The method was aways the same a mason jar and kid power. I do not know why she did not use the mixer but I do know shaking a mason jar full of cream until it turns to butter would make a good punishment.
HAHAHA! I have heard many stories like that! I think I even made butter like that when I was a kid. It’s always a fun experiment. Mmmm. Fresh cream. YUM! 🙂
What a great tutorial, very easy to understand! I have made raw milk butter before but I made it in my Vitamix. I must have got a lot of water out of it, because it seemed to last forever. I love the idea of culturing it, and will try your way or the kefir way next time I make butter. But like you raw cream is super pricey where I live so it may be a while.
The first time I made butter the woman who sold me my gallon of milk, told me to poke a couple holes in the bottom of the jug and let the milk flow out and what is left in the jug is the cream to make the butter with. I am not sure what happened but my precious raw milk went everywhere, it was quit a mess. The next time around I tried getting it out with a giant turkey basting syringe, that worked well but took a long time. No wonder a jug of raw cream is over twenty bucks, LOL!
Thanks again for the great tutorial!
Hi Michelle – Thanks for stopping by! Glad it helped. There is nothing as delicious as homemade butter, IMO! 🙂
I love your recipes and posts! But I wish there were a Print option. 🙂
Hi Mary – Most of my recipes do have a print option, but for some reason, this one didn’t. I have added that feature now. Enjoy! 🙂
Excited to try this! I do have a few questions though. I have access to raw cream and it is very think, not liquid. Can it still be made with that? Also, I’m still a little leery on the “raw” thing right now, can I pasteurize that thick cream and still use it for butter/cheese? Thanks!
Hi Jeannie – Yes, there should be no problem making the butter with that cream. As a matter of fact, that will make deliciously rich butter. As long as your raw milk comes from a safe source, there is no reason to pasteurize it. Pasteurizing will kill all of the good things that make raw milk so nutritious. I don’t have access to raw milk, so I have used cream from my health food store that is grass-fed and lightly pasteurized. Have fun! 🙂
I have made butter a time or two and it’s been amazing! But the raw cream here is too expensive for me to only get around 1/2 to 3/4 a cup of butter from a quart of cream. That’s an $8.00 chunk of butter, and it’s tiny compared to the butter we consume here. But now and then, it’s worth it for a treat. By the way, how do I get this Healthy Child Summit banner off the screen? I’ve already clicked on it and gotten the info but I can’t see around it to see if this post is even correct??
Hi Melissa – If I had access to raw cream, I’d just want to drink it! 🙂 You can close the banner by clicking the “X” in the upper right hand corner. Have a great day!
It is expensive to make but, I buy 3 gallons of whole milk from Alday’s jersey girls in SW Fl. Theirs raw milk is truly pure grass feed. I pay $21. I put it in a suntea jar, empty the milk from the bottom and have low fat to make yogurt. 2-32oz Stoneyfield yogurt are $7. One gallon makes 2 yogurts, plus I have the cream. One gallon I drink, less the cream for butter. And I make mozzarella without the cream and I have more cream for butter. I also make my own ice cream. So if I do the labor of making these items vs buying I save money while paying $7 a gallon for the best milk I’ve ever had. I have never had cultured butter, I will try it this week. Thanks.
Hi Bonnie – I bet their milk is amazing! Quality food does cost more, but it’s worth it. Enjoy! 🙂
Many years we would buy our milk from a farmer after the milk companies would pick up what they wanted. He left the cream on the milk. I would sceem off the cream and put it in the freezer until I had enough to churn. Then I would put it in my churn that got at a second hand store and lay some towels on the floor and watch TV while I churned my cream. After washing the butter and putting it a butter mold I was done. The best butter in the world is home churned Yum
Yummmmm! There is nothing better than fresh butter! 🙂
I have a question…
I bought organic cream and used nonfat yogurt. I cultured it for 24 hours. The xream was thick and didnt smell all that great. It smelled sour… like sour milk. I made the butter… turned out great but the taste and smell is off. Im just worried that my cream went bad… that or im just not used to cultured butter.
Can anyone help me out. Should I throw it out and try again?
Hi Tara – To me, what you are describing is normal. Cultured butter is going to have a more tangy / sour smell and taste than sweet cream butter, which is what most people are used to. I have always been told to go with my nose. If it smells rotten, then toss it. But, there is a difference between rotten milk and sour milk. Make sure you use a high-quality organic yogurt to culture and you want to find cream that has not been ultra pasteurized (UP). Pasteurized is fine, but UP is 100% dead and won’t yield a healthy product. Hope that helps. 🙂
Hey, thanks for triggering a memory! I had forgotten that my dad didn’t like fresh cream butter and he called it “creamery butter”. LOL. My parents always let the cream sour on the counter for a day before making the butter and it always soured better when a thunder storm was coming! They had an electric churn that they used with an extra large Tupperware canister with a hole cut in the top. It worked well. I remember my mom working the water out of the butter in a big wooden bowl with a large carved wooden spoon type thing. I think I’ll be trying it with my mixer! Could you use a small amount of kefir whey to culture, I wonder?
Hi Lori – Thanks for sharing! That is interesting about the thunder storm! 🙂 You most certainly could use some kefir or kefir whey. I’ve never done it that way, but I see no reason it wouldn’t work!
Great post. Wish I would have read this last week when I made butter from colostrum cream using the old shake-a-mason-jar technique!
Thanks Lynn! This is much easier! 🙂
I poured cream into a large jar and shook it up, it took an hour, but I made butter, it was a great feeling, but in future I will use a mixer. It was delicious.
Awesome! That is the way a lot of us learned when we were kids. It’s always a fun science experiment! 🙂
Thank You for this recipe and also the information from a commenter about souring the cream before making butter. I had “saur rahm butter” in Germany and I’ve been trying to find it ever since!
I hope you enjoy Barb! 🙂