FTC Disclosure: Delicious Obsessions may receive comissions from purchases made through links in this article. As an Amazon Associate I earn from qualifying purchases.Read our full terms and conditions here.
UPDATE – July 2012: Since I first wrote the post below (back in April 2011) , I have changed my methods for how I brew water kefir. For an updated post about how to make water kefir at home, please visit this post: “How to Make Water Kefir“. The main change is that I no longer use a Mason jar. I use an airtight vessel for all of my ferments now (excluding kombucha). The post below still contains great information and a how-to recipe, but I just wanted to let you know about the updated version! Thanks for reading!
Many of you know what kefir is. The smooth, tangy, sometimes effervescent yogurt-type drink that so many of us real food lovers recommend. But, did you know that you can also make water kefir, which is dairy free? It’s delicious and SO easy to make!
I experimented with milk kefir before I turned to water kefir. To be honest, I never liked my milk kefir. I could never get the flavor or texture quite right. I turned to water kefir because I thought that it would be a perfect solution – no milk, no funky textures, and cheaper to make. And, you know what? It was! I’ve had great success with water kefir and I now drink it daily.
What is Water Kefir?
Kefir (both water and milk) is full of all sorts of beneficial yeasts, micro-nutrients, enzymes, and good bacteria. True health starts in the gut, so getting as many good bacteria into our bellies is of great importance! It’s considered a probiotic beverage and it’s safe for everyone in the family to enjoy. The flavor is going to vary based on the natural yeasts and bacteria in your house. Over time, your grains will adjust to the “flavors” in your air. It’s pretty fascinating. For someone who does a lot of baking, their grains may taste a little more yeasty than those who don’t do any baking. The general flavor is going to be a slightly dry, mildly sweet and lightly fizzy beverage. It’s very refreshing, especially with some fresh lemon juice added (my personal favorite).
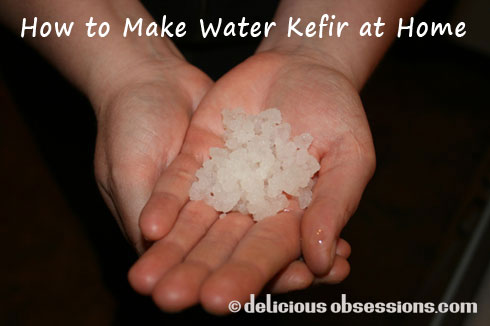
Water kefir, also known as Tibicos, is a “culture of bacteria and yeast held in a polysaccharide matrix created by the bacteria. As with kefir grains, the microbes present in tibicos act in symbiosis to maintain a stable culture. Tibicos can do this in many different sugary liquids, feeding off the sugar to produce lactic acid, alcohol (ethanol), and carbon dioxide gas which carbonates the drink.” This drink is found in many cultures, from all over the world. No two strains of the kefir grains are going to be the same. Like I mentioned above, the grains adjust to the yeast and bacteria present in your house. It’s no different than sourdough breads and cheeses – both are unique to the environments they are made in. It’s important to note that these do not actually have any grain (as in wheat, barley, etc.) in them. It’s just a term coined because of the way they look – like clumps of grain. But actually, they’re clumps of beneficial bacteria!
In my opinion, water kefir is the simplest of the fermented beverages to make. All it takes is some water, sugar, kefir grains, and whatever flavorings you’d like. Or, to make it even more simple, you can use coconut water. Let’s start with water kefir.

Basic Water Kefir Recipe
1/4 cup organic cane crystals, rapadura, or sucanat (honey is not recommended)
1 quart spring water, well water, or filtered water (see note below on filtered water. don’t use city tap water – the chlorine will kill the grains)
3 tablespoons water kefir grains
flavoring of your choice
NOTE: if you use filtered water, then you will need to add a mineral source back into the water since the filter will remove a lot, if not all, of the minerals. The kefir grains need the minerals to thrive, which is why well water or natural spring water is best. But, for those of us who live in the city and are on chlorinated city water, filtered water is our only choice. To add minerals back into the water, you can simply do any of the following:
- add a small pinch of unrefined sea salt
- add a clean egg shell
- a couple drops of liquid minerals
- a drop or two of molasses
I personally don’t like the flavor of the molasses in the kefir, so I always used the egg shell or the salt and have had great success.
Directions:
1. Dissolve the sugar in the water. If you use hot water to dissolve the sugar, then let the sugar water cool to room temperature before adding the grains.
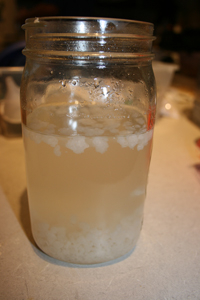
2. When the sugar is fully dissolved, add the egg shell, salt or molasses, along with the kefir grains and cover with a coffee filter, tea towel, or loose fitting lid. You want to keep it covered so that it doesn’t attract bugs, but you also want it to be able to breath a little, as the fermentation can build up pressure in a tightly sealed jar. I usually just place a plastic yogurt lid over the top of the jar. Make sure you leave about a half inch to an inch of space at the top of the jar.
3. Place the water kefir in a warm part of your house. The warmer your house is, the faster the kefir will ferment. My house is usually between 68 and 70 degrees, so it takes about 3 days to get the desired fermentation.
4. When it’s done*, use a plastic strainer to pour the liquid into another jar and reserve the grains. I’ve been told not to use metal, and I’ve read that the metal, especially aluminum, interacts with grains and can kill them. However, I’ve also read many blogs about water kefir and it looks like a lot of people use stainless steel utensils straining/stirring their kefir. The choice is up to you. I got a plastic strainer at Bed, Bath and Beyond, with teeny little holes for only $3.00.
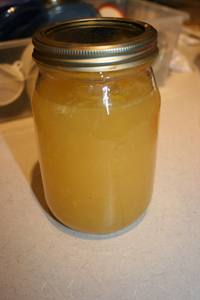
5. Once you’ve strained out the grains, you can then drink it as is, or flavor your kefir any way you want. I prefer to flavor it. You really can do just about anything you want, but here are some ideas. With all of these, I do a second fermentation of 24 hours – just add the flavoring, cover tightly (to help it fizz up a little more) and let it sit out for another day:
- Add fresh lemon, orange, tangerine, grape, blueberry, etc. juice. I usually add about 1/4 cup of juice to 1 quart of kefir.
- Add fresh grated or sliced ginger.
- Add some lemon or orange peel (only from organic fruit and make sure you remove after 12-24 hours or it will become bitter).
- Vanilla extract is good for a cream soda.
In addition to the ideas above, some people like to add dried fruit to the initial fermentation, such as dried figs, raisins, cherries, cranberries, etc. Check out this Water Kefir Flavor Guide for lots of ideas on how to flavor your water kefir!
The sky is the limit. Experiment with any combination that sounds good to you. The key to getting a fizzier drink is to strain off the grains, add the fruit or juice and do a second fermentation. For the second fermentation, you can use a tight sealing jar or the flip top hermetic glass bottles like these. Just make sure you do use caution when opening the bottles after the second ferment!
*How do you know it’s done? You’ll be able to tell when it’s done primarily by taste and if it’s a little fizzy. The kefir grains will eat up approximately 80% of the sugar, so it should taste a lot less sweet than when you first made it. If it’s still too sweet, let it sit out another day.
Coconut Water Kefir – Less Sugar, Just as Tasty
Now, if you’re like me, you might be worried about all that sugar in the kefir. Like I mentioned above, most of the sugar is going to be consumed by the kefir grains, so there’s not going to be a lot leftover. However, I want to avoid as much sugar as possible in my diet, so I stopped making the water kefir and turned to coconut water kefir.
The process is pretty much the same using coconut water, you just end up with a much less sweet beverage, plus, I am trying to get more potassium into my diet, so coconut water is a good option for me.

Coconut Water Kefir Recipe
1 quart of young coconut water
3 tablespoons water kefir grains
Directions
1. In a glass jar, add the coconut water and kefir grains. Make sure you leave about a half inch to an inch of space at the top of the jar.
2. Set aside and cover loosely with a coffee filter, tea towel, etc.
3. Leave at room temperature for 12-36 hours.
4. Strain off the grains, and flavor any way you like.
Now, a couple notes about using coconut water:
- You don’t have to add any additional sugar. The coconut water has enough natural sugars to feed the grains. However, the fermentation process is going to be a lot quicker than plain water kefir. My coconut water kefir is always done within 24 hours, sometimes less.
- Coconut water already has a “different” taste, which some people may not like. Coconut water kefir is going to be a lot stronger tasting and much less sweet than your regular water kefir. Some people will probably not like the flavor of plain coconut water kefir, so adding additional flavorings is really beneficial here.
- You don’t need to add any additional minerals if you don’t want to. There’s enough in the coconut water to sustain the grains. If you do want to add a drop or two of liquid minerals, it certainly won’t hurt though.
- I find that my kefir grains go CRAZY when I make coconut water kefir. The grains multiply like you would not believe. As a matter of fact, within two days, I doubled the amount of kefir grains I had when making coconut water kefir. So, if you decide to make coconut water kefir, be prepared for your grains to go NUTS! 🙂
- The coconut water kefir always got a lot fizzier for me than regular kefir. I’m not sure why. I’d be interested to see if other people have the same experience with it. By the second ferment, it’s downright bubbly, like a sparkling wine.
For the sake of not boring you too much, I have split the Frequently Asked Questions into a separate post and that will be going up in the next day or so! Let me know if you have a specific question and I’d be happy to answer it.
Do you make water or coconut water kefir? If so, I’d love to hear your tips and tricks. I find that the fermented beverages are very forgiving, so there’s really not a lot you can do to mess them up! These are just the things I’ve learned over the few months that I’ve been experimenting and I wanted to share! Leave me a comment below and tell me your favorite water kefir story!
For more information on water kefir, check out these posts:
52 Weeks of Bad A** Bacteria – Week 23 – Water Kefir Revisited
Water, Water, Everywhere, and Lots of Drops to Drink!
Water Kefir Flavor Guide – Lots of Delicious Fizzy Flavors!
Sources:
Tibicos, Wikipedia


40 Comments